• Introduction to Adobe Connect

    This course is a brief introduction for people participating in a meeting hosted in Adobe Connect. It contains basic information that any participant should have before attending such a meeting. If you need assistance of a more technological character, please visit our troubleshooting guide.

    For a quick guide to Adobe Connect, watch the two-minute video below.

     NB: You will be asked to download the Adobe Connect application. Learn how to do so below! 

    • Prior to the meeting

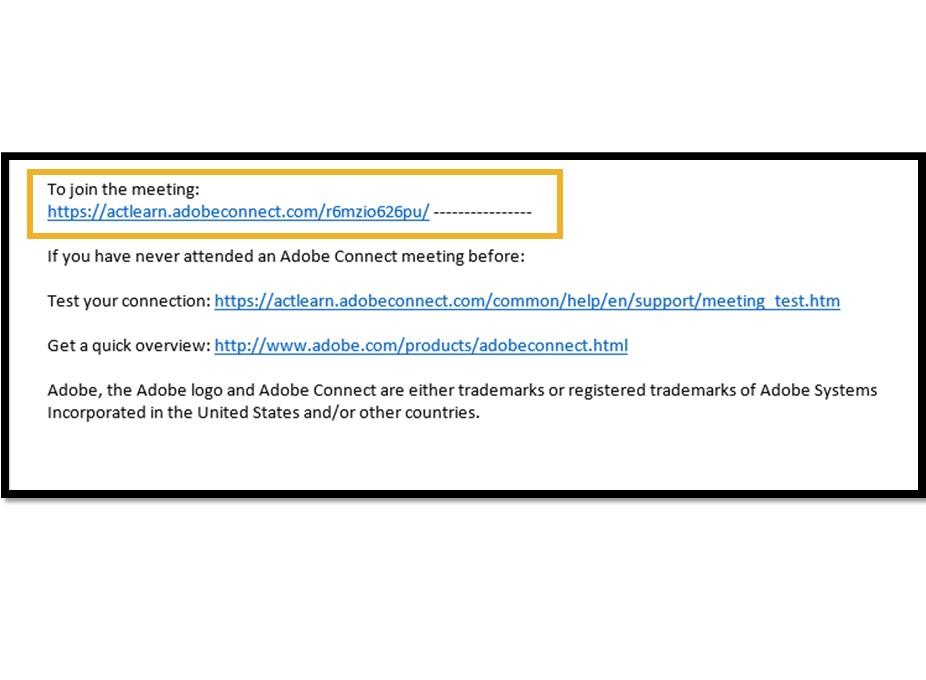
      1 day before meeting starts: For the best experience we suggest that you install the Adobe Connect app, instead of using an internet browser.
      Click on the relevant link below and install the app.


      For WINDOWS click here:        cid:image002.jpg@01D43611.EBC817D0


      For MAC click here:                 cid:image003.jpg@01D43611.EBC817D0


      Before meeting starts: We always recommend that you access the room a while before the meeting starts, so that you can set up the audio and make sure everything is ready. 

      Ensure that you have a working headset, and always connect it to the computer before entering the online room.

      • Joining the meeting


        You have probably received an email invitation with meeting access information. To enter the room, simply click on the link you have received and this will automatically open the meeting room in your installed Adobe Connect application.


         You will now see the log-in screen. Choose Guest and type in your name, country and organisation. Then click Enter Room.


        The meeting room is now launching, and if the meeting host has not yet arrived or the meeting security requires the host to approve your attendance, you will be placed in a waiting room.


        Once the meeting host accepts you into the meeting, the meeting room interface appears.


        • In the meeting: Audio


          Activate your microphone

          Meeting hosts have control over how the audio rights in the meeting are distributed, usually they will grant you speaking rights through microphone.

          When a host grants you rights you can see a microphone icon in the menu bar.

          Clicking on the microphone symbol will activate the microphone, which will turn green, and when you are talking "waves" will appear next to the symbol.

          To mute your microphone, simply press the microphone symbol again and a green line will appear across the icon.


          Set up your audio

          To check if your audio is good to go, please run the Audio Setup Wizard, which you will find by clicking on meeting in the top bar.

          Follow the instructions in the guide to make sure that your speakers and microphone are working correctly and have the right volume.


          • In the meeting: Participation

            When in a meeting, you can participate actively and provide feedback to the presenter and other participants - even without speaking, but through using different emoticons.

            To use an emoticon, click on the arrow just beside the Raised Hand-symbol in the menu bar, and select your desired emoticon.

            If you wish to speak you can click on Raise Hand, and speak when the hosts has called your name. (OBS! Remember to unmute yourself on the microphone icon before you speak, and mute afterwards).

            If you use emoticons such as Agree or Step Away, your status remains this way until you unclick it again.

            To give the presenter a friendly hint, you can choose use emoticons such as Speak Louder or Applause or Laughter. Your host and the other participants will see this, as the icon you have chosen appears next to your name in the Attendees pod.


            • In the meeting: Chat

              To send a message to everyone, simply type your message in the chat pod and hit enter or click on the send icon. 

              You can also choose to write a private chat to the host or another participant.

              To do this, use the Attendees Pod to hover over the name of the attendee you would like to chat with, and select Start Private Chat.

              Private chat messages show up in additional tabs to make it easier to tell them apart from other chats.