Remember
- Always connect your headset before entering the meeting room.
- Make sure that the sound is not muted on your computer.
- Always use a headset that you are sure is working (e.g. in skype).
Test your sound
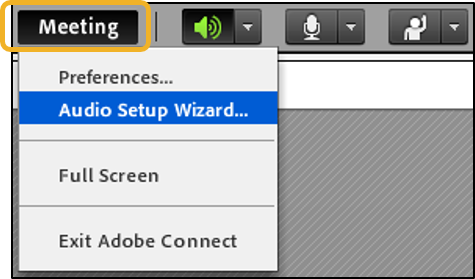
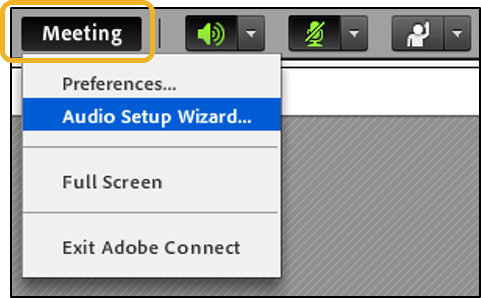
You can test your audio and microphone by running the 'Audio Setup Wizard'.
- Click the 'Meeting' menu in the top left corner.
- Choose 'Audio Setup Wizard' in the drop down menu.
- Test your headset sound in the 'Wizard'.
- If your sound is working, proceed to the following steps of the 'Wizard'.
- If you cannot hear the music when testing the audio, follow the guidelines below.
Note: You can always test your audio and microphone in the open Adobe Connect Test Room!
No sound?
Quick fix
- Make sure that you are using the Adobe Connect application, and not the internet browser.
- Exit the meeting room and close all of your browsers.
- Make sure that your headset is plugged into your computer.
- Re-enter the meeting room.
Note: If you are using a headset that has not previously been connected to your computer, your computer may need to install the drivers.
Microsoft Windows
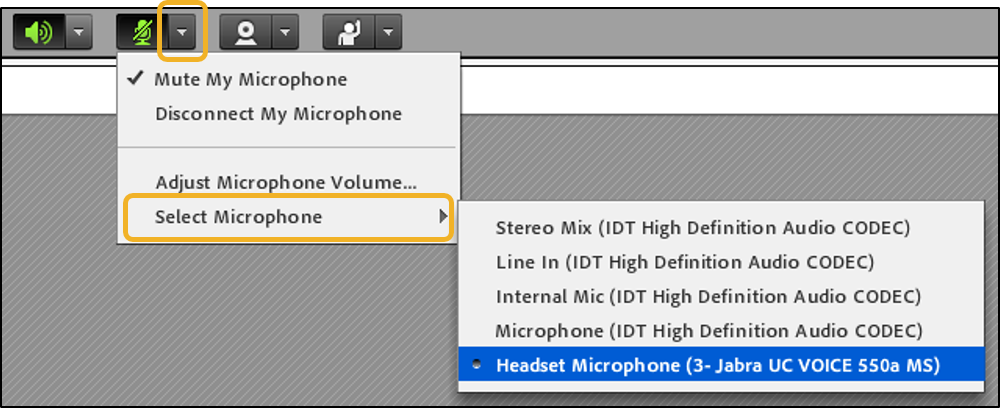
If you use Microsoft Windows, make sure that your headset is selected as your default playback device in your computer settings.
- Right-click the small speaker icon in the bottom right corner of your desktop.
- Make sure that your headset is selected and if not, select it from the drop down menu.
- Close the meeting room and re-enter.
Adjust volume
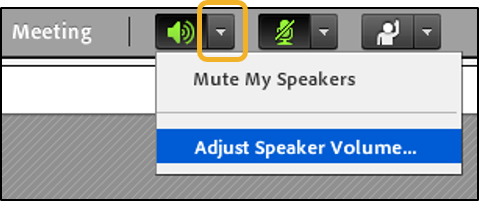
If the sound from the meeting is very high or low, it may help to adjust the speaker volume.
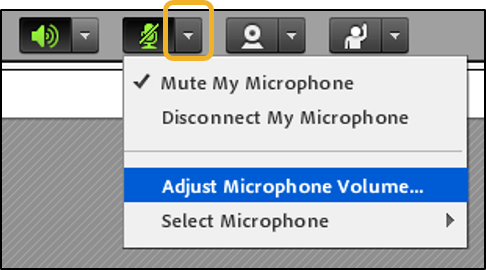
- Click on the arrow next to the speaker icon in the top bar.
- Select 'Adjust Speaker Volume'.
- Adjust the volume by dragging the slider towards 'Low' or 'High'.
- Click on 'OK'.
- Run the 'Audio Setup Wizard' again to test the volume of your audio.
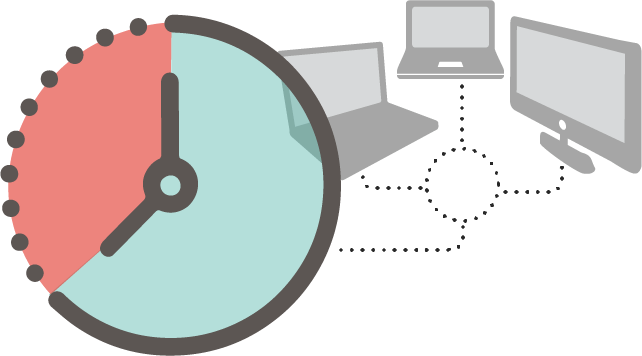
Breaking sound
Breaking sound is usually due to unstable internet connectivity.
To improve your connectivity, please make sure that you:
- Use a wired connection (cable instead of wifi).
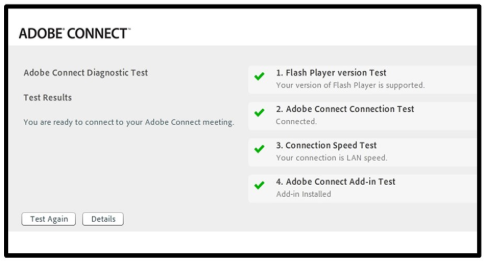
- Run the Adobe Connect Diagnostic Test.
- Quit all other programmes using broadband (browsers, email, skype, etc.).
- If you share the internet connection with other colleagues, ask them to limit the use of broadband.
- Consider sharing a computer with other colleagues participating in the same meeting using the same internet connection.
Noise, feedback and echo
Background noise
Remember to always mute your microphone when you are not speaking.
Otherwise, you will broadcast sound in the meeting room, which may be disturbing for other participants.
Muting your microphone will also reduce the use of broadband and improve the connectivity for participants with unstable internet connectivity.
Feedback
If your microphone is unmuted and you are using your speakers to listen to the meeting, then the sound from your speakers will be picked up by your microphone, and cause audio feedback (a loud ringing noise).
- Exit the meeting room and close your internet browser.
- Connect your headset.
- Re-enter the meeting room.
- If this does not solve the problem, exit the meeting room and re-enter in another browser.
- If you still experience audio feedback, check your audio settings (see Audio).
Echo
If your audio is echoing, it may be because you are logged into the meeting room more than once.
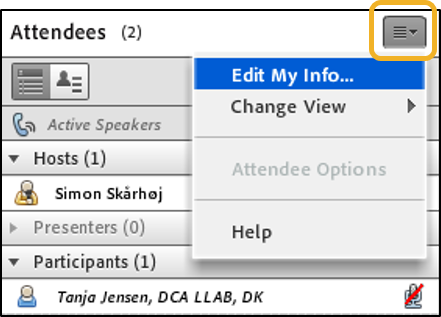
- Check if your name appears more than once in the 'Attendees' pod.
- If your name appears twice or more, you are participating in the meeting room from various browsers.
- Close the browsers that you are not using.
- Your extra names in the 'Attendees' pod should now disappear, as well as the echo.
- If the echo does not go away, close all internet browsers and re-enter the meeting room in the Adobe Connect application.
 Information that is good to know before entering an Adobe Connect meeting:


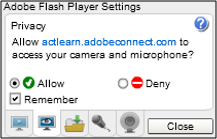
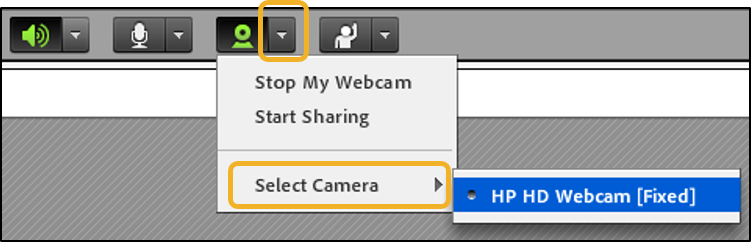
 In some meetings, the host might ask you to connect your webcam. Here is what you have to do: